HOW TO SET UP YOUR PREAMP
Preamps (3)
HOW TO SET UP YOUR PREAMP
In the previous episode, we looked at the basic functions of a microphone preamp. In this tutorial, we’re going to explain proper gain staging and when to use the pad, low cut, and phase reverse switches.
HOW MUCH GAIN?
Microphones have an extraordinary dynamic range, so, depending on the recording situation, they can produce a very low or a fairly high output level. The most basic task of a microphone preamp is to convert the output of your microphone to line level.
In most home studio situations, the output level of your microphone is way below line level, so you’ll have to turn up the gain control. But how much gain is required? Well, it depends. Obviously, you need less gain for screaming rock shouter than for a folk singer, and a snare drum will require less gain than a nylon string guitar. The recording distance makes a big difference, too. Close miking requires less gain than a more distant mic position. And of course the microphone sensitivity makes a difference as well. Condenser microphones usually have a very healthy output level, whereas dynamic mics, including ribbons, typically require much more gain due to their low sensitivity.
So there are three variables: the loudness of the sound source, the microphone distance, and the microphone sensitivity. So much for theory! In practice, it’s best to just rely on the level meter in your recording software (DAW). Your preamp may have a VU meter, too, which is helpful to get you in the right ballpark. But most hardware meters are too slow to catch fast attacks. The most reliable meter is the one in your recording software, because it is directly linked to the AD-converters of your audio interface.
WELCOME TO THE DIGITAL AGE
The most common mistake is to record too “hot”. Back in the days of analog tape, engineers recorded with as much level as possible in order to overcome the tape hiss. Also, overdriving the tape became a fashion, because the saturated tape produced a unique type of compression that sounded great on drums and guitars in particular.
Digital recording is different. There is neither tape compression nor tape hiss. There’s nothing to be gained by recording with “hot” levels. Digital media sound the same at any level – as long you don’t overdrive the converters! There is no such thing as gradual distortion; when digital converters clip, they go from pristine sound to heavy distortion. Digital clipping sounds terrible and should always be avoided.
Because the distortion behavior is different, level meters on analog and digital equipment use different scales. On analog meters, the nominal operating level is marked 0 dB VU, and there’s additional headroom of roughly 20 dB with gradually increasing distortion. So the scale goes from minus infinity to about +20 dB VU (give or take a few decibels).
The digital level meter in your recording software has no headroom above 0 dB. It goes from minus infinity to 0 dBFS (FS stands for full scale). Since there is no headroom above 0 dBFS, it’s up to you to leave a safety margin for accidental peaks. The easiest way to dial in the proper amount of gain is to make a test recording.
Here’s a simple guideline:
Set the gain control so the highest peaks are at least 10 dB below 0 dBFS.
Consider the fact that musicians tend to play (or sing) louder on an actual take than on a test recording. Therefore: When in doubt, use less gain! You can always make the signal louder later on in your DAW, but you can never undo digital clipping.

GAIN STRUCTURE
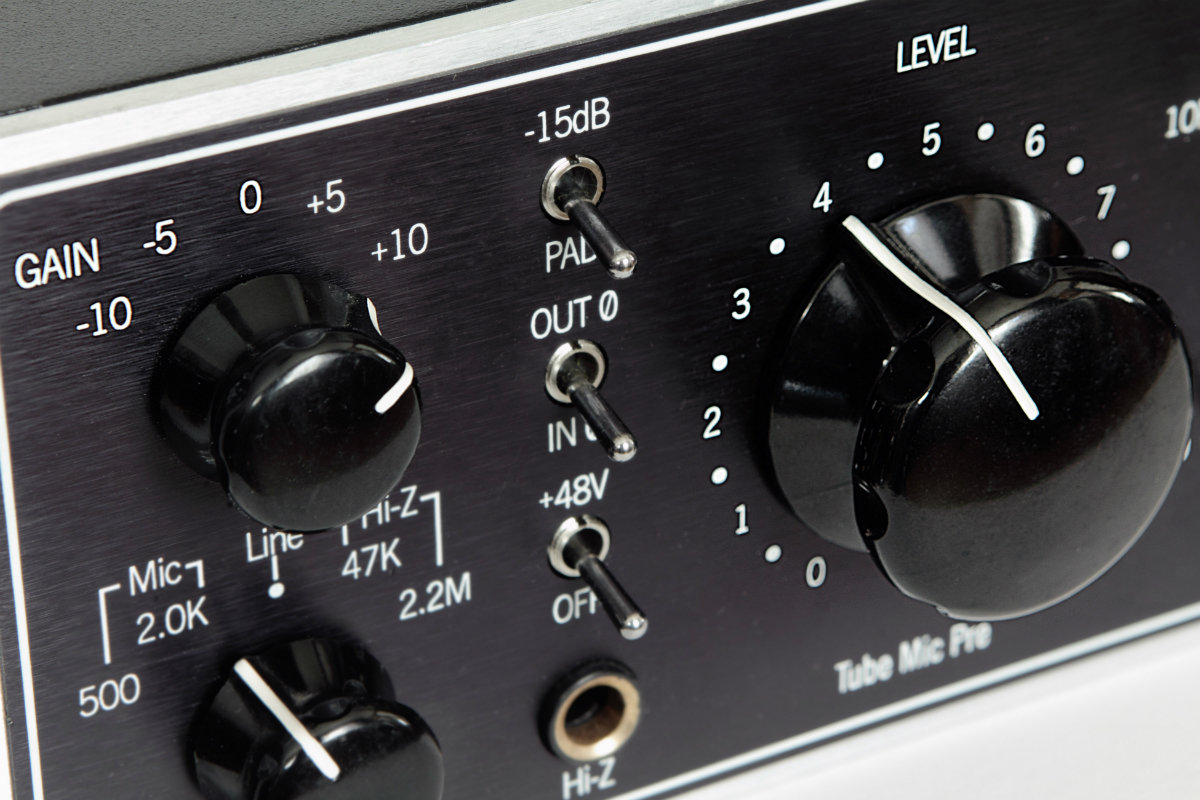
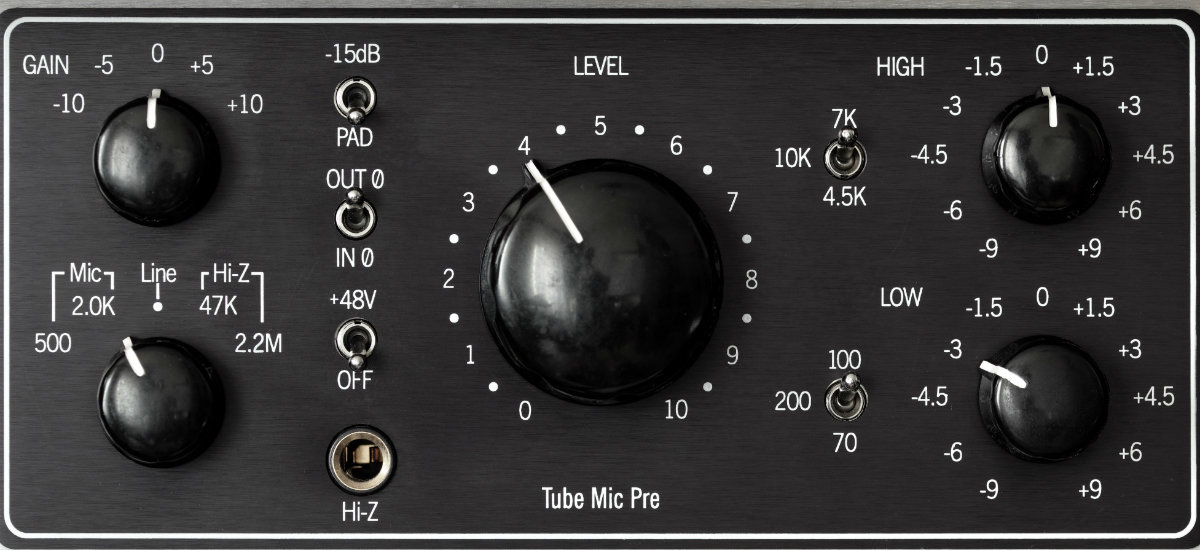
Some (external) preamps have more than one knob to set the level. There may be a gain control and a level control. The functions of which vary from model to model, so it’s a good idea to have a look at the manual. Many high quality preamps have a stepped gain control plus a continuous trim potentiometer to achieve in-between values.
On other preamp models you may find a gain control (stepped or continuous) plus an output level pot, which acts like a fader (i.e. it mutes the signal when you turn it fully counter-clockwise). This allows you to create analog distortion/saturation effects, if you wish: Just turn up the gain control more than is actually required so the preamp’s input stage overdrives the preamp’s output stage. Then attenuate the signal using the output level control to avoid digital clipping in the audio interface/AD-converters. That’s one way to achieve analog “crunch” in the digital age. Conversely, if what you want is a pristine and undistorted sound, turn up the output level and use no more input gain than is necessary to avoid internal distortion.
WHEN TO USE A PAD
In rare cases, microphones produce too much level, so you actually have to attenuate the signal to avoid clipping in your AD-converter. That’s when you have to use a pad. However, people often use pad switches incorrectly or at the wrong stage.
If, for instance, you put a high sensitivity condenser microphone (such as the Neumann TLM 102) inside a kick drum, you may hear distortion. But where does the distortion originate? Microphones may clip, but in this case it’s very unlikely: The Neumann TLM 102 can handle extreme sound pressure levels of up to 144 dB SPL with no audible distortion. But other microphones may clip at much lower levels. (see our tutorial “What Does Maximum SPL mean?”) More likely, the distortion originates further down the line, in your preamp or AD-converter/audio interface.
If you hear unwanted distortion, here’s what you should do (in this order):
- Make sure your preamp does not overdrive your AD-Converters. Turn down the gain control on your preamp.
- If you still hear distortion, make sure your preamp doesn’t clip. Engage your preamp’s pad switch to attenuate the signal before it hits the preamp’s input stage.
- If you’re sure neither your converters nor your preamp distorts, engage the pad switch on your microphone. The pad on a microphone attenuates the signal right behind the capsule, before it hits the microphone electronics, which worsens the noise performance and may affect the sound quality. Therefore, the microphone pad switch should always be your last resort.
Most of today’s high quality studio microphones can handle very high sound pressure levels and often come without a pad.
LOW CUT (HIGH PASS FILTER)
Unlike pad switches, it doesn’t make much of a difference whether you use the low cut on your microphone or on your preamp. You may even use the low cut function in your recording software to much the same effect.
Using a low cut at the recording stage (i.e. on your mic or preamp) makes sense if rumble could ruin your recoding. A low cut is also helpful if the sound is so boomy that it’s hard for the singers or musicians to monitor themselves properly. In other cases, it’s usually best to disengage any hardware low cut filters and cut excess bass in the recording software.
Low cuts often come with various frequencies to choose from:
- 30-40 Hz is a good setting to reduce rumble below any musical information. Only kick drum, bass guitar, double bass and other dedicated bass instruments may sub frequencies below 40 Hz.
- 60-80 Hz is a good setting for male singers and guitars.
- 100-120 Hz is a good setting for female singers.
PHASE REVERSE (POLARITY)
This switch does not affect the sound, it only inverts the signal polarity. The signal polarity becomes an issue, if a sound source is captured by more than one microphone. For instance, many engineers mic the snare drum with two microphones, one from the top, one from the bottom. Since both mics “look” into opposite directions, they are anti-phase. Their signals would cancel out each other to a great degree, which would result in a very thin sound. But if you flip the phase switch on the bottom mic channel, both signals are in-phase again and combine to a fat and brilliant snare sound.
The phase switch is important for vocal recordings, too. A singer hears his or her voice both acoustically via the scull bones and electronically over headphones. Only if both signals are (more or less) in-phase, will the singer have optimal monitoring (which is important for proper intonation). You won’t hear the difference in the control room, only the singer in front of the mic can hear it. So, when you do a soundcheck, try both positions of the phase switch and ask the singer, which gives him/her a fuller, more direct vocal sound.


